Template:Enemy The Wizzrobe is one of the more commonly recurring Legend of Zelda enemies in the Zelda universe, appearing as early as The Legend of Zelda and as recently as A Link Between Worlds. Template:TLoZManual Template:ALttPManual
Characteristics
Wizzrobes, first seen in the original The Legend of Zelda, have been quite the staple of the Zelda franchise, as they've been garbed in colorful outfits, wide-brimmed hats, teleporting and shooting energy beams and fireballs at Link even up to A Link Between Worlds.[1] As stated earlier, these foes are known for their ability to shoot magical, energetic projectiles at Link: the orange variety in The Legend of Zelda set such a trend to follow throughout the later incarnations. The physical aspects of the original The Legend of Zelda Wizzrobes find their way into the titles of Link's Awakening, A Link to the Past, and even into Four Swords Adventures and The Minish Cap; however, as later titles show, the diversity and appearance of the Wizzrobe change dramatically.
Disappearing and teleporting have been popular facets of the Wizzrobe since its introduction in Majora's Mask, as well, enabling the creature to engage Link through ambushes and surprise attacks, only adding more difficulty to a foe that fires accurate, wide-range projectiles.[2] In many titles, but most distinguishably in The Wind Waker, Wizzrobes make alarm sounds when they teleport, and upon reappearing, there is sometimes a flurry of white sparkles or beads that quickly appears, surrounding their position.
Varieties
Color Differences
Beginning with The Legend of Zelda, Wizzrobes always have been distinguished in strength and behavior by color, a scheme that changes a bit between subsequent titles. The Legend of Zelda incorporates Wizzrobes of two colors, the stronger of the two maintains the ability to charge and shoot a flurry of beam attacks at Link at once.
Seen most exclusively in Oracle of Ages and Oracle of Seasons, the green variety of Wizzrobe stay in one place, disappearing and reappearing to attack Link with their beam attack. The red variety has a little more health than the green variety, and instead of staying in one spot, teleports all around the room, attacking in the same way. The blue Wizzrobe is the only variety that moves like a normal enemy, but it has the advantage of being able to make itself invulnerable to attack when changing direction. While it does this it can move through objects, but cannot harm Link. When vulnerable, the blue Wizzrobe starts attacking in a similar way to its other forms. It is faster in its attacks than the other two, and it also has the advantage of being able to move while attacking. The same coloration is seen in Four Swords and The Minish Cap, however, the red version shoots fireballs,[3] the blue version shoots ice blasts,[4] and there is even a fourth version, unique to Four Swords Adventures that prides itself in its Force Gem-sucking powers. In the Japanese versions, the red Wizzrobes are called Firerobes, and the blue ones are called Icerobes.
Physical Differences
Majora's Mask
Though a Wizzrobe also appears in Majora's Mask, misspelled Wizrobe,[5] it is significantly different in appearance from previous Wizzrobes. It tends to transport itself to different pads across a room. Link has to attack it while it is dancing but before it attacks. After Link damages it enough it appears with illusionary copies and dances briefly before attacking with either fire or ice. To defeat it, Link has to guess which of the dancing spirits is the real Wizzrobe and attack before they teleported away (if standing in a good spot, Tatl proceeds to zoom over to the real one). Only the real one appears on the map.
The Wind Waker and Phantom Hourglass
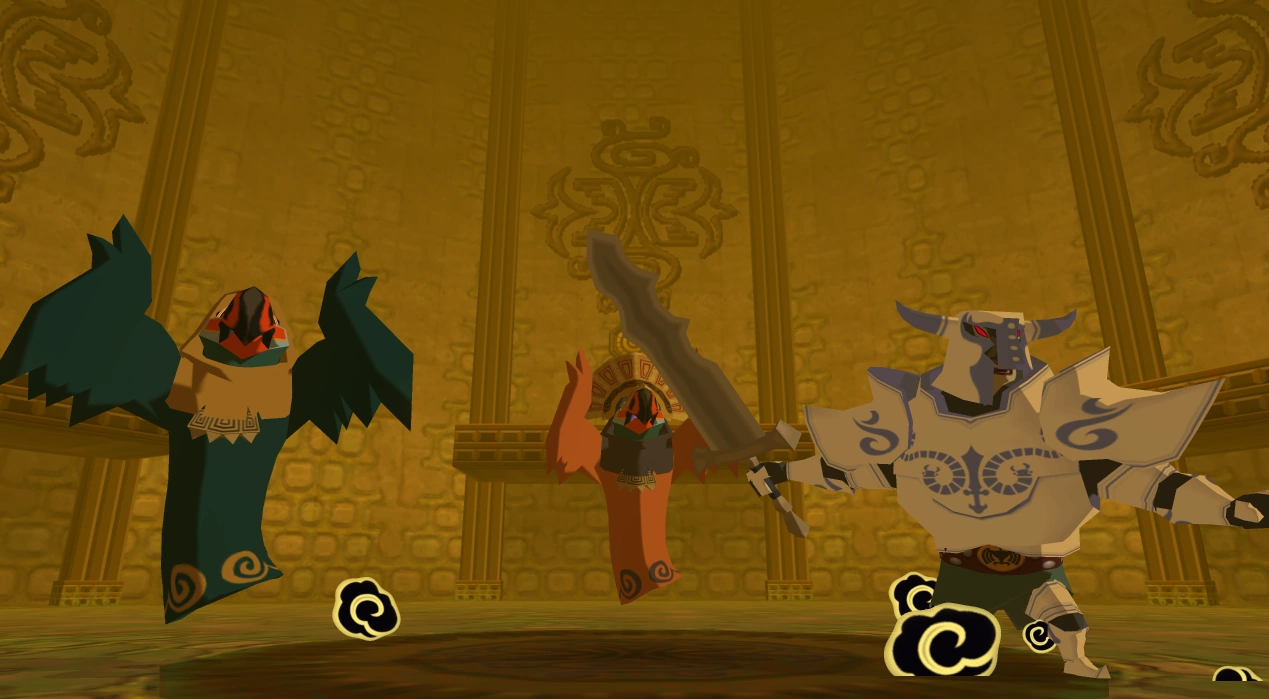
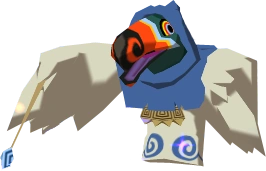
In The Wind Waker, Wizzrobes are characterized by their toucan-like heads. They usually wear dark cloaks with a red hood. There are also three groups of Wizzrobes that wear white cloaks and are found on top of the three triple-platforms in the Great Sea.[6] There is also a more powerful version of the Wizzrobe, who wears a red cloak and an Incan-like crown. It is the mini-boss in the Wind Temple.[7] He has the sole power of summoning other Wizzrobes,[8] as well as enemies such as Darknuts and Moblins. A one-hit kill, even for the Wizzrobe mini-boss, is to freeze it with an Ice Arrow, and toss it at a wall or crush it with the Skull Hammer. When Link defeats this mini-boss, he receives the Hookshot.[9]
Wizzrobes return in Phantom Hourglass after their drastic change in The Wind Waker. They retain the bird masks, but are slightly smaller and carry large scythes instead of wands. In spite of the aesthetic similarities, they take on a completely new role in this game. They appear only in the Temple of the Ocean King and do not use their traditional magic. Instead, they are invisible until right before they attack, and will sneak up to steal time away from the Phantom Hourglass with a swipe of their scythes. They appear as skulls on the map on the top screen, which is the only way to track them without coming in range of their attacks. They can be useful, however, since beating one earns Link 30 more seconds while they can only steal 15 at a time.
Wizard
The Wizard[10] is an enemy in The Adventure of Link that is very similar in behavior to a Wizzrobe. Like Wizzrobes, they appear and disappear while firing magic at Link. Unlike Wizzrobes, they are impervious to Link's sword, and can only be defeated by reflecting their magic back at them using the Reflect magic.[11] Also unlike Wizzrobes, they only appear in Palaces and are therefore likely placed by the old King of Hyrule as guardians rather than being followers of Ganon. Their leader is Carock.
Weaknesses
For the most part, the most original Wizzrobe form is weak to conventional weaponry such as the sword, arrows, bombs, and the like, although in Link's Awakening they are invulnerable to swords. However, the more important aspect of battling these foes is catching them before they teleport and disappear. The incarnations seen in The Wind Waker are sometimes too far out of reach for the typical sword strike, appearing in the air, so use of the Fire Arrow or any other arrow proves successful in the long run over sword usage. Interestingly, the ice Wizzrobe seen in Four Swords and all types of Wizzrobe - not just Ice ones - in The Minish Cap are instantly killed by the Lantern.
Other Appearances
The Legend of Zelda comic

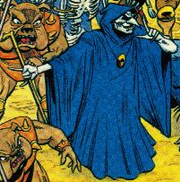
A Wizzrobe from the comics
The Wizzrobes in the Legend of Zelda comic highly resemble their original artwork depiction from The Legend of Zelda. Although a Wizzrobe makes a brief appearance in He Also Serves,[12] these foes play a more important role in To the First Power and, to an extent, in Queen of Hearts.
In To the First Power, a Wizzrobe commands several of Ganon's minions to tie Link up after Zelda heads inside the Eagle Labyrinth to train against Ganon's minions. However, the Wizzrobe reveals to Link that he filled the Eagle Labyrinth with the most dangerous of enemies so that Zelda may not stand a chance up against them.[13] Although Link confronts the Wizzrobe and tells him that capturing Zelda will do no good since he is the one that Ganon wants, the Wizzrobe confesses that he is not interested in following Ganon's orders anymore.[14] He elaborates that he has gathered many other minions who feel the same way, and as soon as he destroys Link and Zelda, all of Ganon's minions will join his renegade army, leaving Ganon to fail.[15]
Eventually, Zelda makes her way to where the Wizzrobe and Link are, delighting the foe since he will now be able to defeat her himself.[16] The Wizzrobe shoots a magic beam at her, which Zelda dodges and quickly fires an arrow from her bow towards the foe, making it fall into a fire pit that sends the Wizzrobe back to Ganon.[17] The story ends with the Wizzrobe kneeling in front of Ganon while the Prince of Darkness praises him since he could make use of a "deceitful and treacherous" man like him.[18]
The Wizzrobe in Queen of Hearts is in charge of securing the magic container that holds all of Queen Seline's magical powers.[19] When Link and Seline make their way to where the magic container is, they are confronted by a Wizzrobe and a horde of Ganon's other minions. Link is then heavily injured and faints, and before the Wizzrobe can finish him off, Zelda appears and shoots an arrow at the magic container,[20] restoring Seline's powers and allowing her to easily defeat the Wizzrobe and the rest of the enemies.[21]
The Crystal Trap
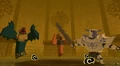
Wizzrobe in The Wand of Gamelon
A Wizzrobe disguised as a Fortune Teller appears in The Crystal Trap. Known as Madame Grusha, she resides in the Town of Ruto. If Zelda visits Madame Grusha's hut, she will guess that Zelda has traveled far and that she is seeking three things. The fortune-teller goes on to explain that she knows how to help the princess, but she cannot speak of it in their current location and asks that Zelda follow her into her inner sanctum.[22] Following Madame Grusha will lead to Zelda's death, while deciding to not follow her will result in a fight between Zelda and the Wizzrobe, along with some Moblins; however, the princess will manage to defeat both enemies and come out of the hut alive.[23]
The Wand of Gamelon
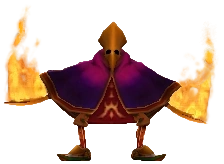
In the non-canon CD-i game Zelda: The Wand of Gamelon, a single Wizzrobe appears as an individual character and "boss" who has kidnapped Lady Alma. He is fought in the Shutoy Lake Tower, and is killed by reflecting his "disintegration spell" at him. He is most likely the one who put Link in the mirror. In this game, he looks very different from the canonical version of the species, now resembling a green-skinned, humanoid wizard with a purple cloak.
A Link to the Past comic
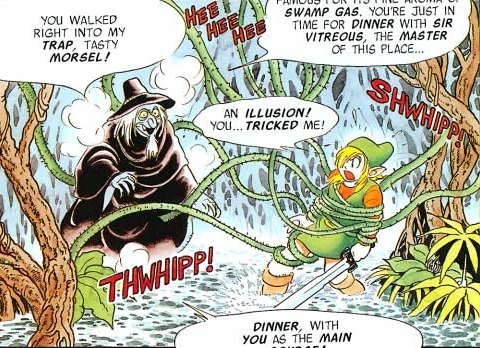
Link caught in the Wizzrobe's trap
A Wizzrobe is featured in Chapter 9 of the A Link to the Past comic. After Link exits the Swamp Palace, he hears Princess Zelda contact him telepathically from beyond the wasteland.[24][25] Epheremelda, who cannot hear Zelda's calling, advises Link against going to the wasteland since it is too dangerous.[26] Link disregards her suggestion,[27] heading into the wasteland where stumbles into an oasis from where Zelda is calling his name. The young hero ventures in and finds her,[28] but as he remembers the Maiden's words of Zelda being inside a turtle rock,[29] the princess turns out to be an illusion made by a Wizzrobe, who promptly captures Link and conjures Vitreous from the swamp to devour him.[30] However, a whirlpool is created that engulfs both Vitreous and the Wizzrobe, and from beneath Zora appears to rescue Link.
Trivia
- While Wizzrobes are not present in Twilight Princess, Zant Masks use the same attack strategy as the Wizzrobes from The Wind Waker, teleporting back and forth and firing magic blasts at Link.
- The Wizzrobe designs (except from Majora's Mask, The Wind Waker and Phantom Hourglass) are similar to the Simirror enemy from the Kirby series. They also resemble the Black Mage of the Final Fantasy series.
- The beeping sound that Wizzrobes emit in The Wind Waker when they appear or teleport is similar to the sound that plays when Ganon teleports in A Link to the Past.
- Blaaz, the boss of The Temple of Fire in Phantom Hourglass, appears to be slightly based off of the Wizzrobe. It shares a similar appearance and attack strategy to Wizzrobes of the past, especially Wizzrobes of The Wind Waker.
Gallery
- WizzrobeOrange.png
Orange Wizzrobe in The Legend of Zelda
- WizzrobeBlue.png
Blue Wizzrobe in The Legend of Zelda
- Wizard.png
Wizards from The Adventure of Link
- Wizzrobe ALttP.png
Wizzrobe as seen in A Link to the Past
- PurpleWizzrobeALttP.png
Purple Wizzrobe found in the Ganon's Tower in A Link to the Past
- WizrobeOracleGreen.png
Wizzrobe in Link's Awakening

Light World Wizzrobe as seen in Ancient Stone Tablets

"Wizrobe" in Majora's Mask
- WizrobeOracleRed.png
Red Wizzrobe in the Oracle titles
- WizrobeOracleBlue.png
Blue Wizzrobe in the Oracle titles
The start of the fight against the Wizzrobe mini-boss

A white Wizzrobe from The Wind Waker
- WizzrobeFSA.png
A Wizzrobe from Four Swords Adventures
- Wizzrobe MC.gif
Wizzrobe in The Minish Cap
- Wizzrobe Fire MC.gif
Fire Wizzrobe in The Minish Cap
- Wizzrobe Ice MC.gif
Ice Wizzrobe in The Minish Cap
- RedWizrobeLoZArt.png
Million Publishing guide artwork of an orange Wizzrobe in The Legend of Zelda
- BlueWizrobeLoZArt.png
Million Publishing guide artwork of a blue Wizzrobe in The Legend of Zelda
See Also
Template:Refbar
| Language | Name | |||||
|---|---|---|---|---|---|---|
| Wizzrobe | Fire Wizzrobe | Ice Wizzrobe | Wizard | Red Wizzrobe | ||
| Japanese | Template:Japanese Template:Japanese |
Template:Japanese | Template:Japanese | Template:Japanese | ||
| French | Sorcier | Sorcier de Feu | Sorcier de Glace | Ruoge Sorcier | ||
| German | Pyromagus | Pyromagus | Eis-Pyromagus | Zaurob | Pyromagus der Meisterklasse | |
| Italian | Sciamanix | Tunica |
Re della Sciamanix | |||
| Spanish | Invocantis | Grande Invocantis | ||||
Mazura · Jermafenser · Rebonack · Carock · Gooma · Barba · Thunderbird ![]() · Link's Shadow
· Link's Shadow
Light World
Ball and Chain Trooper ![]() · Six Armos Knights · Lanmola Trio · Moldorm · Agahnim
· Six Armos Knights · Lanmola Trio · Moldorm · Agahnim ![]()
Dark World
Helmasaur King · Arrghus · Mothula · Blind the Thief · Kholdstare · Vitreous · Trinexx · Ganon
Super Helmasaur · Super Arrghus · Super Mothula · Super Blind · Dark Links![]()
Bosses
Moldorm · Genie · Slime Eye · Angler Fish (2D) · Slime Eel · Facade · Evil Eagle (2D) · Hot Head · Shadow Nightmares
Guardians
Rolling Bones ![]() · King Moblin
· King Moblin ![]() · Hinox
· Hinox ![]() · Dodongo Snakes x2
· Dodongo Snakes x2 ![]() · Lanmola
· Lanmola ![]() · Cue Ball
· Cue Ball ![]() · Master Stalfos x4 · Gohma Twins · Armos Knight
· Master Stalfos x4 · Gohma Twins · Armos Knight ![]() · Smasher
· Smasher ![]() · Grim Creeper · Turtle Rock · Blaino
· Grim Creeper · Turtle Rock · Blaino
Bosses
Gohma · King Dodongo · Barinade · Phantom Ganon · Volvagia · Morpha · Bongo Bongo · Twinrova · Ganondorf · Ganon
Middle Bosses
Lizalfos · Big Octo · Stalfos · Meg · Flare Dancer · White Wolfos · Dark Link · Dead Hand · Gerudo Thief · Iron Knuckle · Dynalfos
Bosses
Odolwa · Goht · Gyorg · Twinmold · Majora ![]()
Middle Bosses
Dinolfos · Gekko · Wizzrobe · Gerudo Pirate · Wart · Gekko and Mad Jelly
Captain Keeta · Iron Knuckle · Sharp · Igos du Ikana · Garo Master · Gomess · Eyegore
Bosses
Aquamentus · Dodongo · Mothula · Gohma · Digdogger · Manhandla · Gleeok · Medusa Head · General Onox ![]()
Sub-Bosses
Brother Goriyas · Facade ![]() · Omuai · Agunima · Great Moblin
· Omuai · Agunima · Great Moblin ![]() · Syger · Vire
· Syger · Vire ![]() · Poe Sisters · Frypolar
· Poe Sisters · Frypolar
Bosses
Pumpkin Head · Head Thwomp (2D) · Shadow Hag · Eyesoar · Smog · Octogon · Possessed Nayru · Plasmarine · Ramrock · Veran ![]()
Sub-Bosses
Giant Ghini · Swoop · Subterror · Armos Warrior · Great Moblin ![]() · Smasher · Vire
· Smasher · Vire ![]() · Angler Fish (2D) · Blue Stalfos
· Angler Fish (2D) · Blue Stalfos
Bosses
Gohma · Kalle Demos · Gohdan · Helmaroc King · Jalhalla · Molgera · Puppet Ganon ![]() · Ganondorf
· Ganondorf
Minibosses
Green Bokoblin · Moblin · Mothula · Darknut · Cyclos · Phantom Ganon · Stalfos · Wizzrobe · Mighty Darknut · Big Octo![]()
Bosses
Phantom Ganon ![]() · Stone Arrghus · Helmaroc King · Big Poe · Big Moldorm x2 · Frostare · Vaati · Ganon
· Stone Arrghus · Helmaroc King · Big Poe · Big Moldorm x2 · Frostare · Vaati · Ganon
Sub-Bosses
Chief Soldier · Shadow Link ![]() · Manhandla · Dodongos · Big Dark Stalfos · Gohma · Big Dodongo
· Manhandla · Dodongos · Big Dark Stalfos · Gohma · Big Dodongo
Bosses
Big Green Chuchu ![]() · Gleerok · Mazaal · Big Octorok
· Gleerok · Mazaal · Big Octorok ![]() · Gyorg Pair · Vaati
· Gyorg Pair · Vaati ![]()
Sub-Bosses
Madderpillar ![]() · Dark Nut · Big Blue Chuchu
· Dark Nut · Big Blue Chuchu ![]() · Red Dark Nut · Black Knight
· Red Dark Nut · Black Knight
Bosses
Diababa · Fyrus · Morpheel · Stallord · Blizzeta · Armogohma · Argorok · Zant · Puppet Zelda · Ganon · Ganondorf ![]()
Sub-Bosses
Ook · King Bulblin · Dangoro · Twilit Carrier Kargarok · Twilit Bloat · Deku Toad · Death Sword · Darkhammer · Darknut · Aeralfos · Phantom Zant
Bosses
Stagnox · Fraaz · Phytops · Cragma · Byrne · Skeldritch · Demon Train · Chancellor Cole · Malladus
Stagnox II · Fraaz II · Phytops II · Cragma II · Skeldritch II · Dark Link![]()
Sub-Bosses
Mothula · Geozard · Rocktite · Ice Keese · Freezard · White Wolfos · Geozard Chief · Big Blin ![]() · Snapper · Helmet Chuchu · Metal Chuchu · Stalfos · Heatoise · Stalfos Warrior · Gerune · Ergtorok ·
· Snapper · Helmet Chuchu · Metal Chuchu · Stalfos · Heatoise · Stalfos Warrior · Gerune · Ergtorok ·
Bosses
Ghirahim ![]() · Scaldera · Moldarach · The Imprisoned
· Scaldera · Moldarach · The Imprisoned ![]() · Koloktos · Tentalus · Levias
· Koloktos · Tentalus · Levias ![]() · Bilocyte
· Bilocyte ![]() · Demise
· Demise
Sub-Bosses
Stalfos · Lizalfos · Stalmaster · Moldarach · LD-002G Scervo · Dark Lizalfos · Magmanos · Moldorm · Dreadfuse
Bosses
Yuga ![]() · Moldorm · Margomill · Gemesaur King · Arrghus · Knucklemaster · Stalblind · Zaganaga · Dharkstare · Grinexx · Yuga Ganon
· Moldorm · Margomill · Gemesaur King · Arrghus · Knucklemaster · Stalblind · Zaganaga · Dharkstare · Grinexx · Yuga Ganon
Sub-Bosses
Armos · Red Stalfos · Heedles · Green & Red Goriyas · Gigabari · Gibdos & Purple Mini-Moldorms · Red Eyegores · Flying Tiles & Devalants · Big Pengator & Pengators · Fire Gimos · Moldorm · Lorule Ball and Chain Soldier · Arrghus
StreetPass Bosses
Bosses
Margoma · Arrghus · Moldorm · Blizzagia · The Lady's Pets ![]() · Stalchampion · Prismantus · The Lady
· Stalchampion · Prismantus · The Lady
Shadow Link x3![]()
Mini-Bosses
Electric Blob King · Electric Blob Queen · Hinox Brothers · Freezlord · Vulture Vizier · Grim Repoe · Gigaleon
Bosses
Windblight Ganon · Fireblight Ganon · Master Kohga · Thunderblight Ganon · Waterblight Ganon · Calamity Ganon · Dark Beast Ganon ![]()
Sub-Bosses
Stone Talus · Igneo Talus · Frost Talus · Molduga · Hinox · Blue Hinox · Black Hinox · Stalnox · Igneo Talus Titan · Molduking
Bosses
Colgera · Mucktorok · Marbled Gohma · Queen Gibdo · Phantom Ganon · Seized Construct · The Demon King's Army · Demon King Ganondorf · Demon Dragon ![]()
Sub-Bosses
Flame Gleeok · Frost Gleeok · Sludge Like · Thunder Gleeok · King Gleeok · Yunobo · Frox · Flux Construct · Moragia · Molduga · Hinox · Stalnox · Frost Talus · Igneo Talus · Stone Talus · Battle Talus · Stone Talus (Luminous) · Ganondorf · Master Kohga · Phantom Ganon
| ||||||||||||||
.png)
Template:WarmEnemy Template:IceEnemy
- ↑ "Appears in the Palace of Winds and Dark Hyrule Castle. They fire magic bolts from afar. Hit them when they appear so they don't cast another spell!" — Wizzrobe figurine (The Minish Cap)
- ↑ "Wizzrobe - Habitat: Tower of the Gods - Magic: Fire, summons - These mighty mages are adept at wielding flame and summoning other creatures to their aid. The only way to defeat them is to try to predict their movements and attack them during the brief moments that they assume physical form." — Wizzrobe figurine (The Wind Waker)
- ↑ "Appears in the Palace of Winds & Dark Hyrule Castle. They wield fire magic. Hit them when they appear so they don't cast another spell!" — Fire Wizzrobe figurine (The Minish Cap)
- ↑ "Appears in the Palace of Winds and Dark Hyrule Castle. They wield ice magic. Hit them when they appear so they don't cast another spell!" — Ice Wizzrobe figurine (The Minish Cap)
- ↑ "It's a Wizrobe [sic]. You'll get your chance right when it starts to attack. Be on the lookout for it!" — Tatl (Majora's Mask)
- ↑ Template:Cite book
- ↑ Template:Cite book
- ↑ "Wizzrobe (Boss) - Habitat: Wind Temple - Magic: Summons - These high-level mages use the magic of summoning to aid them in battle. They are the only Wizzrobes that can summon other Wizzrobes, which makes them formidable." — Wizzrobe (Boss) figurine (The Wind Waker)
- ↑ Template:Cite book
- ↑ Template:Cite book
- ↑ Template:Cite book
- ↑ Template:Cite book
- ↑ Template:Cite book
- ↑ Template:Cite book
- ↑ Template:Cite book
- ↑ Template:Cite book
- ↑ Template:Cite book
- ↑ Template:Cite book
- ↑ Template:Cite book
- ↑ Template:Cite book
- ↑ Template:Cite book
- ↑ Template:Cite book
- ↑ Template:Cite book
- ↑ Template:Cite book
- ↑ Template:Cite book
- ↑ Template:Cite book
- ↑ Template:Cite book
- ↑ Template:Cite book
- ↑ Template:Cite book
- ↑ Template:Cite book